Whether you’re running a food truck, a restaurant kitchen, or just enjoying weekend BBQs at home, you likely rely on LPG cylinders to keep things running smoothly. But as convenient as these gas bottles are, they aren’t something you can just forget about. Regular testing is essential—not just for compliance, but for your safety. This article walks you through how LPG bottle testing works, why it’s necessary, and what to expect if you’re a user or distributor of LPG cylinders.
Why LPG Bottles Need Regular Testing
LPG bottles—like any pressurised vessel—can become dangerous over time. Exposure to weather, rough handling, corrosion, and even minor manufacturing defects can weaken the cylinder’s structure. Since these bottles store gas under high pressure, any crack or weak spot can lead to catastrophic leaks or explosions.
That’s why Australian standards require gas cylinders to be tested and recertified every ten years. Without this recertification, it’s illegal to refill or use the bottle. Do you see that date stamped on the collar or neck ring? That’s the key to knowing when your next test is due.
The Legal and Safety Framework in Australia
In Australia, LPG cylinder testing is governed by strict regulations. The standards ensure bottles meet specific requirements for:
● Structural integrity
● Valve functionality
● External and internal corrosion
● Proper gas retention and pressure resistance
Testing stations must be accredited by relevant authorities (such as WorkSafe or a similar body), and only certified gas fitters or technicians can conduct inspections and tests.
Failing to comply doesn’t just risk safety—it can also mean fines, insurance issues, and in commercial cases, loss of business licenses.
Step-by-Step: The LPG Bottle Testing Process
Let’s break down how a typical LPG bottle test is carried out:
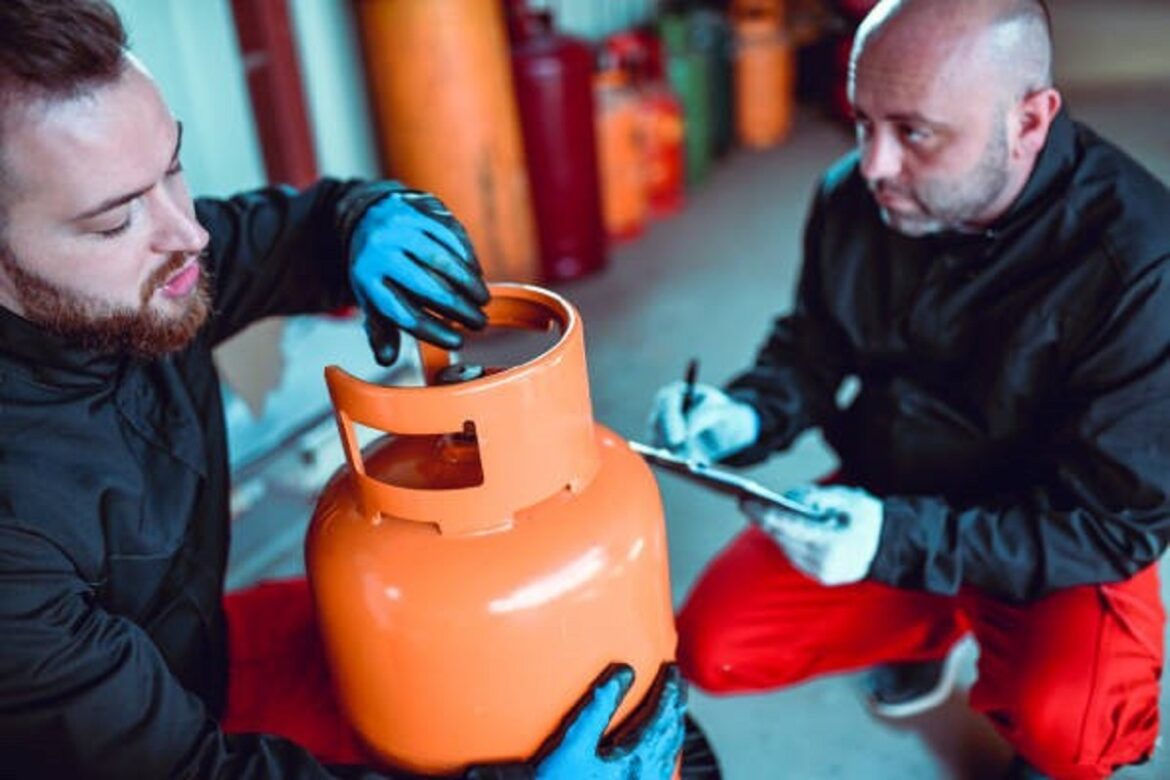
1. Pre-Test Visual Inspection
Before anything else, the cylinder is inspected visually. The technician checks for obvious signs of damage such as dents, rust, gouges, or leaks. Bottles with visible structural damage or severe rust are immediately rejected to avoid further risk.
2. Valve Removal and Internal Inspection
If the bottle passes the initial inspection, the valve is carefully removed. This step is crucial because even if the outside looks fine, the inside may tell a different story. Cylinders are checked for signs of internal rust or contamination. Any moisture inside the bottle is a red flag and must be dealt with.
3. Hydrostatic Pressure Testing
This is the most important part of the LPG bottle test. The cylinder is filled with water and pressurised well beyond its normal working pressure. A pressure gauge monitors for any drops, which would indicate a leak or structural failure. If the cylinder holds pressure without deformation or leakage, it passes the test.
4. Valve and Thread Inspection
After the pressure test, the valve’s thread and seating area are inspected. Stripped threads, worn O-rings, or damaged valves are replaced. In some cases, the valve is upgraded entirely to ensure modern safety standards.
5. Repainting and Stamping
Once the bottle passes all checks, it’s typically repainted and fitted with a new stamp indicating the month and year of the next due test. The paint protects against corrosion, and the stamp ensures traceability. A test station mark may also be added to identify who performed the test.
6. Reassembly and Leak Testing
The final step involves reinstalling the valve and conducting a leak test. The technician sprays a soapy solution around the valve and other fittings to check for escaping gas. If no bubbles appear, the cylinder is good to go.
What Happens If a Bottle Fails the Test?
Not all bottles survive the process. Cylinders that fail are either scrapped on the spot or quarantined. Some bottles may be repairable, depending on the nature of the defect, but many are removed from circulation entirely to avoid risk.
This isn’t a bad thing—it means dangerous cylinders are being taken off the market. The good news? Most LPG suppliers, including Plus Gas, offer swap services where you can exchange expired or damaged bottles for compliant ones.
How Often Should You Test or Replace Your LPG Bottles?
The standard interval is every 10 years, but regular users—especially in commercial settings—should visually inspect their bottles more frequently. Look out for:
● Surface rust
● Dents or bulges
● Hissing sounds are heard when the valve is closed
● A lingering gas smell around your bottle
If anything feels off, don’t risk it. Bring your cylinder to a qualified LPG supplier or testing station for evaluation.
Don’t Leave It to Chance
If you haven’t checked the test date on your LPG bottle recently, take a moment now. Look for the stamped collar near the handle. If it’s past due—or getting close—it’s time to take action.
Don’t risk your safety or others around you—be proactive, and if you’re unsure, get advice. And remember, there’s more to gas safety than bottles alone. If you notice exposed connections or suspect an issue, contact Plus Gas about open-ended gas pipe safety alerts for more information and recommended precautions.